Every zone on a motorcycle vest carries established meaning. Where a patch sits on the cut communicates as much as what the patch says. A rank patch on the wrong side, a back panel that doesn’t follow three-piece proportions, a novelty patch where a club emblem should go — each signals to experienced riders exactly how much the wearer knows about MC culture.
This guide covers biker vest patch placement from back panel to front chest to sleeves — with the specific rules that apply to MC members, riding club members, and independent riders building personal vests.
For the meaning behind each patch type, visit our biker patch meanings guide. For the full resource hub, see our complete biker patches guide.
The Anatomy of a Biker’s Cut (Vest)
Before placing a single patch, every rider should understand the distinct zones of a cut. The vest is not a blank canvas — it is a structured communication system with established areas for specific types of patches.
- ▸Back Panel — The largest and most significant area. Holds the three-piece set for MC members. The most regulated real estate on any cut.
- ▸Front Left Chest — Traditionally reserved for officer rank patches, club name patches, or membership designation. The most prominent position on the front panel.
- ▸Front Right Chest — Typically holds the member’s name patch or hometown patch. Secondary position to the left chest.
- ▸Collar Area — A smaller zone often used for single small patches — support patches, pin-style insignia, or small affiliation badges.
- ▸Sleeves — Used for flag patches, veteran insignia, achievement patches, and specialty badges. Left and right sleeves carry different conventions.
- ▸Front Bottom Hem — Lower front area for support patches, novelty patches, and cause patches that don’t carry chest-level designation.
Understanding these zones before you start sewing prevents the most common placement errors — and ensures your vest reads the way it was intended.
Front Biker Vest Patch Placement Rules
The front of the vest is the first thing people see when you ride up or walk into a room. Front biker vest patch placement follows conventions that have been consistent across MC culture for decades — though they differ significantly between formal MC clubs and riding clubs or social clubs.
Left Chest — Rank and Club Designation
In traditional MC culture, the left front chest is the position of authority. Officer rank patches sit here — President, Vice President, Treasurer, Road Captain, Sergeant-at-Arms. For non-officer members, the left chest typically carries the club name patch or a membership designation patch. This is the highest-status position on the front panel, and patched members treat it accordingly.
Right Chest — Name and Hometown
The right front chest is reserved for personal identification patches — typically the rider’s name or road name, and often a hometown or chapter location patch. This placement is consistent across most MC traditions and riding club conventions. It is the most universally understood position on the front of the vest.
Front Bottom — Support and Novelty
The lower front area is used for patches that don’t carry chest-level designation — support patches for affiliated clubs, cause patches, novelty patches, and small insignia that add personal character without claiming club rank. This is also where many riders place 8-ball patches, small flag patches, and brand insignia.
What NOT to Place on the Front
Avoid placing three-piece patch elements (top or bottom rockers, center patch) anywhere on the front panel — these belong exclusively on the back. Also avoid placing rank patches in positions that don’t match your actual role, and never replicate another club’s front patch configuration.
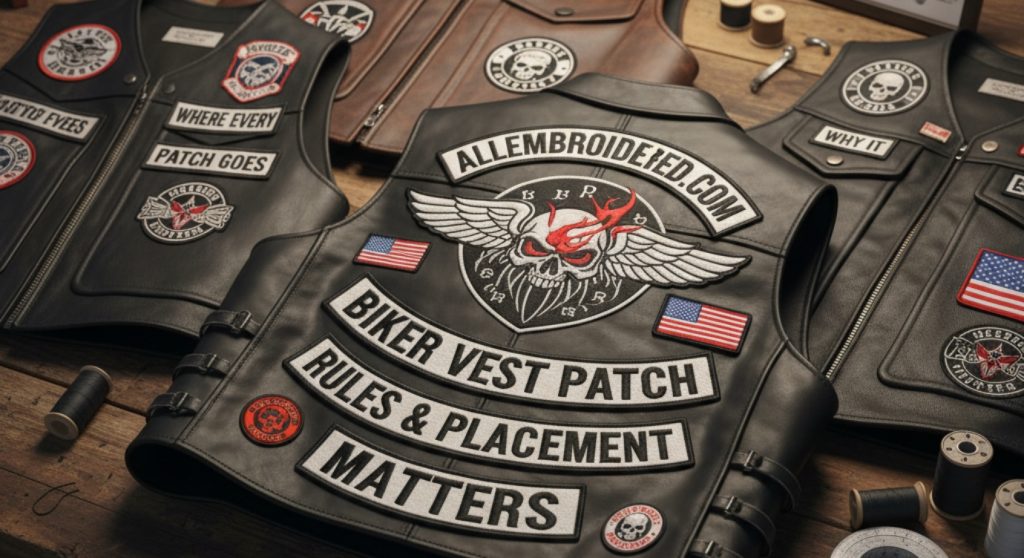
Biker Vest Back Patches — The Three-Piece Layout
The back panel of a cut is the most significant and most regulated area in MC culture. For chartered MC members, biker vest back patches follow a strict three-piece layout that is universal across club traditions. Every element has a precise position, and deviation from these proportions is immediately visible to experienced riders.
| Patch Element | Position on Back | Typical Size |
|---|---|---|
| Top Rocker | Arched across the top of back panel, just below collar | 10–12 inches wide, 2–3 inches tall |
| Center Patch | Centre of back panel, between the two rockers | 8–12 inches — the dominant visual element |
| Bottom Rocker | Arched across the bottom of back panel, above the hem | 10–12 inches wide, 2–3 inches tall |
The three pieces work as a unified set — spacing between them is as important as the patches themselves. The top rocker sits high on the back panel below the collar seam, the center patch dominates the middle third, and the bottom rocker sits close to the bottom hem. When all three are correctly proportioned and positioned, the set reads as a cohesive statement of identity.
Back patches are the most regulated area in MC culture because they are the most visible declaration of club identity. For a deeper breakdown of each element’s meaning, see our top rocker, center patch, and bottom rocker explained guide.
Sleeve Patch Placement
Sleeves are secondary patch real estate — important but less regulated than the back panel or front chest. They carry patches that communicate personal history, national identity, and individual achievements rather than club rank or affiliation.
Left Sleeve
The left sleeve is the most common position for state or national flag patches — the rider’s home state flag, American flag, or national ensign for non-US riders. Military branch insignia and veteran patches also conventionally appear on the left sleeve, continuing a tradition directly inherited from military uniform customs. Support patches for aligned clubs occasionally appear here as well.
Right Sleeve
The right sleeve tends to carry achievement patches, specialty badges, rally patches, and other patches that document specific experiences — mileage achievements, charity ride completions, event participation. It is a more personal and less regulated area than the left sleeve, giving riders flexibility in documenting their riding history.
On leather vests without sleeves, sleeve-convention patches typically migrate to the lower front panel or collar area. The placement logic — personal history on the right, national/veteran identity on the left — still applies where space allows.
Rules for Front Biker Vest Patch Placement — Social Club Differences
The placement rules described above apply most strictly to chartered MC clubs. Social riding clubs, Christian biker clubs, and non-MC groups follow the same general framework but with considerably more flexibility — reflecting the difference in how these groups approach patch culture overall.
Social clubs typically use a single patch or two-piece patch setup rather than a three-piece set. Without a bottom rocker territory claim, the back panel is more open — riders in social clubs often use large single-piece back patches that serve as the club’s visual statement without following MC three-piece proportions.
On the front panel, social club members have more creative freedom. The left chest/right chest convention is often observed as a general guideline rather than a hard rule. Christian biker clubs in particular tend to incorporate faith-based patches prominently on the front panel in positions that would be reserved for rank patches in MC culture — reflecting their different emphasis.
The one rule that applies universally across all club types and independent riders: never configure front or back patches in a way that could be mistaken for a specific MC’s full colours. The social freedom of non-MC placement doesn’t extend to replicating earned club insignia. For more on how social club and MC rules diverge, see our social club vs MC patch rules guide.
Common Patch Placement Mistakes to Avoid
These are the five placement errors that appear most often on new builds — and the ones that experienced riders notice first.
1. Wrong Position for Club Patches
Rank patches placed on the right chest instead of the left, or name patches moved to the left chest to accommodate a larger design. These swaps break the established convention that most experienced riders read instinctively.
2. Back Patch Proportions Off
A center patch that is too small, rockers that are too narrow, or inconsistent spacing between the three elements. The back panel reads as a unified set — if one element is disproportionate, the whole set looks unfinished.
3. Patch Overcrowding
Filling every inch of the vest surface without clear visual hierarchy. Overcrowded patches compete with each other rather than communicating. Intentional spacing between patches — especially on the front panel — makes individual patches more readable.
4. Iron-On Patches on Leather
Iron-on backing requires heat to bond, and leather does not respond to heat the way textile does. Applying an iron-on patch to a leather cut results in poor adhesion, peeling edges within weeks, and potential damage to the leather surface. All patches on leather vests should be sewn.
5. Placing Earned Patches Before They Are Earned
Sewing officer rank patches before holding the role, or placing achievement patches for milestones not yet reached. In MC culture, wearing patches you haven’t earned is a serious breach of protocol. On personal vests, it undermines the authenticity of the build over time.
How to Mark Patch Positions Before Sewing
Getting proper patch placement for biker vest builds right requires preparation before the needle touches the fabric. Committing to final stitch positions without test placement first is the most reliable way to end up with crooked patches or wrong spacing.
- ▸Chalk or tailor’s pencil marking — Draw the outline of each patch position on the vest before placing anything. On dark leather, a light chalk pencil creates a clear, removable guideline. Mark centre points and corner positions.
- ▸Temporary pin or clip placement — Use safety pins or basting clips to hold patches in position while you wear the vest or look at it laid flat. This allows final adjustments before any stitching begins.
- ▸Measure from seams, not edges — Use the collar seam and side seams as reference points rather than the vest edge. This keeps placements symmetric across an asymmetric body shape.
- ▸Get a second opinion before stitching — Put the vest on and have someone photograph it from the back and front. What looks level on a flat surface often reads differently on the body. This step catches asymmetry that is invisible when the vest is laid flat on a table.
For MC back patches especially, consider a professional tailor or leather worker for the final sewing. The back panel is too visible — and too significant — to risk an amateur finish.
Frequently Asked Questions
Where does the top rocker go on a biker vest?
The top rocker is an arched patch that sits at the very top of the back panel, immediately below the collar seam. It runs horizontally across the full width of the back, typically 10–12 inches wide, and its arc follows the natural curve of the shoulder line. It always appears as the uppermost element in the three-piece set, above the center patch. Nothing else is placed above the top rocker on the back panel.
Can I put patches on the front of a leather vest?
Yes — the front panel is an active part of any biker vest build. The left chest, right chest, collar area, and lower front hem all carry patches in established MC convention. The key rules: use sew-on patches rather than iron-on on leather, follow the left chest/right chest designation convention if you are in a club, and avoid configuring front patches in a way that replicates another club’s specific front panel layout.
What goes on the right chest of a biker vest?
In traditional MC convention, the right front chest holds the member’s name patch or road name patch. A hometown or chapter patch frequently accompanies this. For riders outside MC membership, the right chest is a natural position for a personal name patch, a small club logo, or a patch that identifies something personally significant — home state, service branch, or cause affiliation. It is a more personal position than the left chest.
How far apart should back patches be?
There is no single universal measurement, but the three-piece back patch set should work as a visual unit with consistent, balanced spacing between elements. A common guideline is ¼ to ½ inch of visible vest material between the rocker edges and the center patch border. The set should fill the back panel proportionally without the pieces crowding each other or leaving large gaps. Lay all three out on the vest flat before any marking to confirm the visual balance before committing.
Can I use iron-on patches on a leather cut?
No — iron-on patches are not suitable for leather vests. The heat required to activate iron-on adhesive can damage leather, and even when applied carefully, the bond on leather degrades quickly through flexing and riding. Iron-on patches are designed for textile fabrics like denim. For leather cuts, sew-on is the correct and durable attachment method. If you want the convenience of removable patches, Velcro-backed options with sewn-on receiver panels are a more reliable alternative.
Build Your Vest the Right Way
Now that you know where every patch goes, source the right patches for each position. Browse our full range of embroidered vest patches — or order custom rockers, name patches, and club insignia with no minimum order.
Also read: Custom Biker Patches With No Minimum | Complete Biker Patches Guide