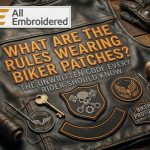
Biker Patches for Vest: A Buyer’s Guide to Types, Materials & Where to Shop
Compare embroidered, woven, and PVC patches. Learn what separates quality from cheap. How to attach patches to leather correctly. What to look for in a supplier — and what red flags to avoid.
What to Know Before You Buy
When buying biker patches for a vest, prioritise embroidered patches with high thread density, a merrow (rolled) border edge, and sew-on backing for leather vests. Iron-on patches work for denim but are not reliable on leather. Check colour fastness, border quality, and backing weight before purchasing — these determine whether a patch lasts one season or one decade.
“Not all biker patches are created equal — and the difference shows after the first season of riding.”
The patch market ranges from quality embroidered pieces built to outlast the vest they’re sewn onto, to cheap iron-on prints that fade, peel, and separate within weeks of purchase. For riders building a vest that means something — whether a personal statement build or a full club cut — knowing how to identify quality before you buy saves money, time, and the frustration of replacing patches that didn’t last.
This guide covers everything you need to make confident purchases of biker patches for vest builds — from patch types and backing options to quality indicators, sizing, attachment, and where to source. For styling guidance, see our biker patches style guide. For custom orders, see custom biker patches with no minimum.
Types of Biker Patches for Vests
Three production methods account for virtually all biker vest patches on the market. Each has a distinct profile of detail, durability, and appropriate use case.
| Type | Detail Level | Durability | Best Use |
|---|---|---|---|
| Embroidered | Medium-high — bold design, strong text | Excellent — decades of wear | Club patches, rockers, back panels, chest patches |
| Woven | Very high — fine text, thin lines, gradients | Very good — thinner profile | Name tags, small patches, intricate logo designs |
| PVC / Rubber | Medium — bold shapes, modern aesthetic | Outstanding — fully weatherproof | Novelty patches, event patches, modern lifestyle builds |
Embroidered patches are the traditional and most common choice for motorcycle vest builds. The raised thread surface, high colour saturation, and characteristic merrow border are what riders associate with quality MC patches. For any patch that carries formal significance — club insignia, rockers, statement back patches — embroidered is the standard.
Woven patches are produced on a loom, creating a flatter, thinner result with significantly finer detail capability. They are ideal for name patches with small text, complex logo designs where embroidery would lose fine lines, and any patch where a lower-profile finish is preferred.
PVC and rubber patches are moulded rather than stitched — completely waterproof, UV-resistant, and particularly suited to novelty patches, event patches, and modern lifestyle vest builds where the material aesthetic fits the overall design direction.
Backing Options — Sew-On, Iron-On, and Velcro
The backing you choose is as important as the patch itself. The right backing depends on your vest material and how permanently you want the patch attached.
Sew-On — The Gold Standard for Leather
Sew-on backing is a plain fabric backing that requires hand or machine stitching to attach. It is the only reliable option for leather vests — leather does not respond to heat-activated adhesives, and iron-on patches applied to leather bond poorly and degrade quickly. Sew-on patches on leather last as long as the thread used to attach them, which on quality leather can be decades. All significant patches on a leather cut should be sewn.
Iron-On — Works on Denim, Not on Leather
Iron-on backing uses heat-activated adhesive that bonds when pressed with an iron or heat press. On denim and cotton fabrics, it creates an initial bond that works well for patches in low-flex areas. On flexing seams or areas of repeated movement, iron-on bonds loosen over time. The practical solution: use iron-on as a positioning tool to hold the patch in place, then sew around the border to make the attachment permanent.
Velcro — Swappable and Removable
Velcro-backed patches with sewn-in receiver panels allow patches to be rotated between vests, removed for cleaning, or swapped seasonally. The receiver panel is sewn on permanently; the patch attaches via hook-and-loop. A practical choice for achievement patches, event patches, and any patch that may be replaced over time. Not appropriate for club insignia or any patch carrying formal significance.
The Short Rule
Leather vest: always sew-on. Denim vest or jacket: iron-on acceptable but sew-on lasts longer. Swappable setup: Velcro with sewn receiver panel. Never iron directly onto leather — not even briefly as a test.
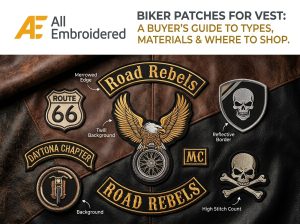
Quality Indicators — What Separates Good Patches From Bad Ones
These are the five points to check when inspecting patches for biker vest builds — whether ordering online or handling patches in person.
1. Thread Density and Coverage
Hold the patch up to light. On a quality embroidered patch, no backing fabric should be visible through the thread coverage. Sparse stitching that shows the backing underneath is the clearest sign of low-cost production. Dense, consistent thread coverage gives patches their colour saturation and structural durability.
2. Merrow Border Quality
The rolled border edge (merrow border) should be tight, even, and not pulling away from the patch body. Inspect the corners — quality patches maintain consistent tension around the entire perimeter including curves and angles. An uneven or loose merrow border indicates calibration issues that affect the main stitch surface equally.
3. Colour Fastness
Thread colour that fades rapidly in UV light is one of the most common failures in low-cost patches. Quality suppliers use UV-stabilised thread stock and will confirm this when asked. If a supplier cannot speak to the UV stability of their thread, treat the answer as a red flag. A patch that fades within one riding season is a patch that needs replacing — twice the cost of buying quality first.
4. Backing Weight and Feel
A quality embroidered patch has a firm, substantial feel — the result of dense thread coverage over a proper twill backing. Patches that feel thin, papery, or flexible are under-stitched. The patch should hold its shape firmly when handled and not bend easily at the edges.
5. Colour Accuracy and Consistency
For stock patches, compare the received item to the product image for colour accuracy. For custom patches, compare to the approved proof. Thread dye lots affect colour consistency between production runs — for club sets ordered at different times, this can result in subtle mismatches. Always order complete sets in a single production run to guarantee colour consistency across all pieces.
Patch Sizing Guide for Vests
Ordering the wrong size is one of the most common mistakes in vest builds — particularly for riders buying patches online without handling them first. Use these standard dimensions as your reference:
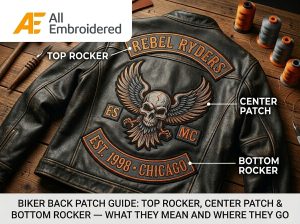
- ▸Back center patch: 8–12 inches wide × 9–11 inches tall — should dominate the back panel visually
- ▸Top and bottom rockers: 10–12 inches wide × 2–2.5 inches tall — width should span the back panel
- ▸Front chest patches: 3–5 inches wide × 1.5–3 inches tall — proportional to the chest panel area
- ▸Sleeve patches: 3–4 inches — small enough to sit flat without wrapping around the arm
Before ordering any back patch, measure the available back panel on your specific vest — from collar seam to hem, and shoulder to shoulder across the stitching. Vest dimensions vary significantly between manufacturers, and a patch sized for one vest may be proportionally wrong on another.
Where to Buy Biker Patches
The patch market spans everything from specialist suppliers with decades of experience to generic marketplace sellers with no quality control. These are the indicators of a legitimate supplier worth purchasing from:
- ▸Clear product photography showing the merrow border, thread surface, and backing material
- ▸Transparent specification listing: thread type, backing weight, border style
- ▸Return or exchange policy — suppliers confident in their quality stand behind their product
- ▸Customer reviews that reference patch quality after extended use — not just appearance on arrival
- ▸Custom patch capability with a sample/proof approval stage before production
Red Flags to Avoid
No returns policy. No product specifications listed. No sample stage for custom orders. Patch photography that only shows the design flat without border or backing detail. Prices significantly below market for the patch type — quality embroidery has a cost floor, and pricing well below it signals compromised production standards.
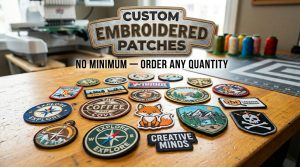
Custom vs Stock Patches — When Each Makes Sense
Stock patches — pre-designed patches available from catalogue — are the right choice for novelty patches, generic imagery patches, flag patches, and any patch where a specific original design is not required. They are immediately available, typically lower cost per unit, and cover the vast majority of personal vest builds for independent riders.
Custom patches are the right choice for club insignia, rockers, memorial patches, statement back patches where original design matters, and any patch that needs to be unique. Custom production involves a digitising stage and sample approval, adds 2–4 weeks to lead time, and costs more per unit — but produces a patch that no one else has. For club identity patches, custom is the only appropriate option.
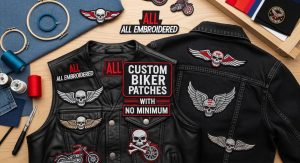
For a full guide to the custom ordering process, design file requirements, and no-minimum ordering, see our custom biker patches guide.
How to Attach Patches to a Leather Vest
Sewing patches onto leather requires the right materials and a methodical approach. Attempting to rush the process produces crooked patches and visible stitching errors that are difficult to correct without damaging the leather.
- ▸Thread: Heavy-duty polyester or nylon thread — not cotton, which degrades faster than leather. Match the thread colour to the patch border or use a neutral that does not show against the vest.
- ▸Needle: Leather needle (glover’s needle) with a triangular tip designed to pierce leather cleanly without tearing. A standard sewing needle will drag through leather and create uneven holes.
- ▸Stitch type: Saddle stitch (two needles working from both sides of the leather simultaneously) produces the strongest and most even result for hand-sewing. Machine sewing is faster and equally effective if the machine is set up for leather.
- ▸Professional option: For back patches, rockers, and any patch in a prominent position, a professional leather worker or tailor who works with motorcycle gear produces cleaner results than most DIY approaches. The cost is moderate and the outcome significantly better on high-visibility positions.
Frequently Asked Questions
Are embroidered patches better than woven?
Neither is categorically better — they serve different purposes. Embroidered patches are the traditional MC choice: thicker, more textured, higher visual presence, and ideal for bold designs with clear text. Woven patches produce finer detail and are thinner — better for small name patches, intricate logos, and designs where embroidery thread would lose fine lines. Choose based on the specific patch design and position rather than a general preference for one type.
Can I use iron-on patches on a leather vest?
No — iron-on patches are not suitable for leather vests. Leather does not respond to the heat required to activate iron-on adhesive, and even brief heat contact can damage or discolour leather surfaces. Even when an initial bond forms, it degrades rapidly through the flexing and movement of normal wear. For leather cuts, all patches must be sewn. Attempting iron-on application on leather is one of the most common and frustrating mistakes in vest building.
How do I prevent patches from peeling?
Peeling is almost exclusively a problem with iron-on attachment, not with sewn patches. Sewn patches — properly stitched around the full perimeter — do not peel. If you have iron-on patches that are starting to lift at the edges, sew around the border immediately to prevent full separation. For new purchases, specify sew-on backing and use iron-on only as a positioning aid before stitching. A fully sewn patch on a quality vest is effectively permanent.
What is the best way to clean a vest with patches?
For leather vests with sewn patches: spot clean the leather with a leather-appropriate cleaner, avoiding soaking. Do not machine wash leather. For the patches themselves, a slightly damp cloth with mild soap removes surface dirt without disturbing the thread. For denim vests with sewn patches: cold machine wash inside-out, gentle cycle, no tumble drying. Heat from a dryer degrades iron-on adhesive and can affect thread colour over repeated cycles. Air dry flat to prevent distortion.
Shop Quality Biker Patches for Your Vest
Embroidered, woven, and PVC patches — all built to last on a cut. Browse our full stock range or order custom patches with no minimum. Sew-on and iron-on backing options available across all products.
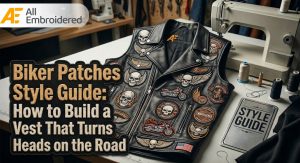
Also read: Biker Patches Style Guide | Custom Patches Guide | Complete Guide