Quick Answer
Custom biker patches with no minimum order allow solo riders and small clubs to commission professional embroidered or woven patches without committing to large quantities. Provide your artwork in vector format, choose your backing (sew-on recommended for leather cuts), and most suppliers can produce single-piece or small-run orders within 2–3 weeks.
“You shouldn’t need to order 500 patches to get a quality custom design.”
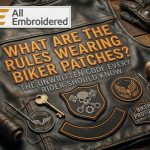
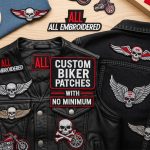
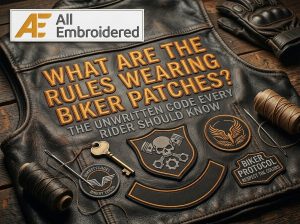
For years, minimum order quantities put custom patch production out of reach for solo riders, small social clubs, and anyone needing a single memorial patch. That has changed. Custom biker patches no minimum suppliers now serve independent riders with the same quality standards as large club orders — embroidered, woven, or PVC, at any quantity.
This guide walks through every decision in the ordering process — from choosing your patch type and backing to preparing artwork and evaluating suppliers. For placement guidance once your patches arrive, see our complete biker patches guide and biker vest patch placement rules.
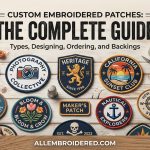
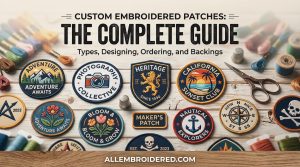
Types of Custom Biker Patches
Three main production methods cover the full range of custom biker vest patches. Each has different characteristics for detail, durability, and use case. Choosing the right type before you contact a supplier saves time and ensures the finished patch matches what you need.
| Material | Detail Level | Durability | Best For |
|---|---|---|---|
| Embroidered | Medium-high — bold text and logos | Excellent — decades of wear | Club patches, rockers, MC insignia |
| Woven | Very high — fine text, gradients | Very good — thinner profile | Name tags, small patches, fine detail designs |
| PVC / Rubber | Medium — bold shapes and text | Outstanding — fully weatherproof | Novelty patches, riding event patches, outdoor use |
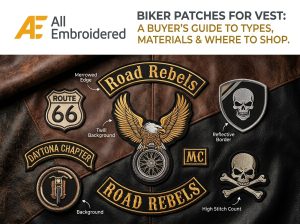
Embroidered patches remain the traditional standard for MC culture. The raised thread surface, bold colour saturation, and characteristic merrow (rolled) border edge are what riders expect to see on a cut. For club patches, rockers, and any insignia that carries formal meaning, embroidered is the default choice.
Woven patches are produced on a loom rather than embroidered over a backing, which creates a flatter, thinner patch with significantly finer detail capability. They work well for small name patches, intricate logos, or any design where embroidery thread would lose fine lines and small text.
PVC and rubber patches are moulded rather than stitched, making them completely waterproof and highly durable against road conditions. They are increasingly popular for event patches, novelty designs, and lifestyle vests where a modern material aesthetic fits the build.
Iron-On vs Sew-On: Which Is Right for Your Vest?
Backing choice is as important as patch type — and it is one of the most common ordering mistakes for first-time buyers. The right backing depends entirely on the vest material you are attaching to.
Leather Vests — Always Sew-On
Leather does not respond to the heat required for iron-on adhesive activation. Applying an iron directly to leather causes surface damage, and even heat-press application results in poor bonding that degrades quickly with the flexing of normal wear. For any leather cut — vest or jacket — sew-on backing is the only reliable option. All custom biker patches for vest on leather should be specified as sew-on at the time of ordering.
Denim Cuts — Iron-On Works, Sew-On Lasts Longer
Denim is the material iron-on backing was designed for. The heat activates a clean, strong initial bond. However, even on denim, iron-on patches on areas that flex repeatedly — shoulder areas, side seams — will eventually lift at the edges. For patches that carry formal significance, sew-on over the top of an iron-on backing (using the iron-on as a positioning tool) produces the most durable result.
Velcro-Backed: The Removable Option
Velcro-backed patches with a sewn-on receiver panel allow patch rotation between vests or removal for washing. This works well for achievement patches, event patches, and any patch that may be replaced or swapped over time. The receiver panel is sewn permanently; the patch attaches and removes via the hook-and-loop system. Not appropriate for formal club insignia.
The Design Process — Step by Step
Understanding what happens between your initial concept and a finished patch helps you prepare properly and avoid the most common delays in the production process.
Step 1 — Concept and Brief
Define the patch dimensions, shape (die-cut, standard rectangle, shield, round), colours (specify Pantone numbers if colour accuracy matters), and intended position on the vest. The more specific your brief, the fewer revision rounds you go through.
Step 2 — Artwork File
Vector files (AI, EPS, SVG) produce the sharpest results and are preferred by all quality suppliers. High-resolution PNG (minimum 300dpi) is acceptable. JPEG files and screenshots are not suitable — they contain compression artefacts that corrupt during digitisation.
Step 3 — Digitising
A digitiser converts your artwork into a stitch file that the embroidery machine reads. This is where fine lines, small text, and complex gradients either succeed or get simplified. Quality suppliers show you a digital proof of the stitch layout before cutting thread.
Step 4 — Sample Proof and Approval
A physical or digital sample is produced for your approval before full production runs. Always approve a sample for club insignia, rockers, or any patch where colour matching is critical. This stage is the last opportunity to catch errors before production is committed.
Step 5 — Production and Delivery
Standard production runs 10–14 business days from approved proof. Rush options typically add a 20–30% surcharge and compress production to 5–7 days. International orders add 3–10 days shipping depending on destination and service level chosen.
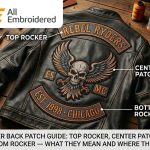
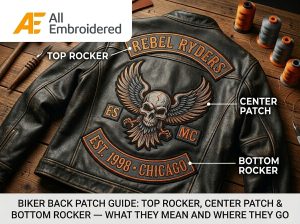
Custom Biker Patches and Rockers
Ordering a rocker set — top rocker, center patch, and bottom rocker — requires additional specification compared to a standard patch order. Custom biker patches and rockers work as a visual system, which means colour matching, font consistency, and arc radius must be coordinated across all three pieces.
- ▸Font specification — Provide the exact font name or a reference image. Rocker text in an unintended font reads as amateurish immediately. Many clubs have a specific typeface that has become part of their identity.
- ▸Arc radius matching — The arc curve of both rockers should be identical so they read as a matched set when viewed on the back panel. Specify that top and bottom rockers should use the same arc specification.
- ▸Colour matching across the set — Order all three pieces in the same production run where possible. Thread dye lots vary between batches — patches ordered at different times may have subtly different colour values even for the same specified colour.
- ▸Order as a set — Reputable suppliers offer rocker sets with the center patch as a single order. This ensures consistency and simplifies the approval process.
For sizing and positioning of rockers on the back panel, see our top rocker, center patch, and bottom rocker guide.
Biker Patch Template — Sizing Standards
Using a biker patch template ensures consistent sizing across a club order — particularly important when multiple members are ordering patches at different times and patches need to align correctly on the vest.
- ▸MC back center patch: 10–12 inches wide × 9–11 inches tall
- ▸Top and bottom rockers: 10–12 inches wide × 2–2.5 inches tall
- ▸Front chest rank patch: 3–4 inches wide × 1.5–2.5 inches tall
- ▸Name patch: 4–5 inches wide × 1.5–2 inches tall
What to Look For in a Patch Supplier
Not all patch suppliers produce at the same standard. These five indicators separate quality producers from those who cut corners.
1. Thread Count and Density
High-quality embroidered patches have dense thread coverage with no visible backing fabric showing through the design. Thin or sparse stitching is the clearest sign of a low-cost production run.
2. Colour Fastness
Ask whether thread colours are UV-stabilised. Cheap thread fades significantly within one riding season. A quality supplier will confirm colour fastness standards for their thread stock.
3. Merrow Border Quality
The rolled edge (merrow border) should be tight, even, and not pulling away from the patch body. An uneven merrow border indicates machine calibration issues that also affect the quality of the main stitch surface.
4. Sample Policy
A legitimate supplier offers a physical or detailed digital sample before production. Any supplier who proceeds directly to full production without a sample approval stage is a red flag.
5. Response Time and Communication
Suppliers who respond slowly to pre-order questions will respond slowly to production issues. Communication quality before an order is a reliable predictor of the experience during and after production.
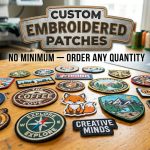
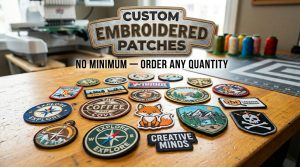
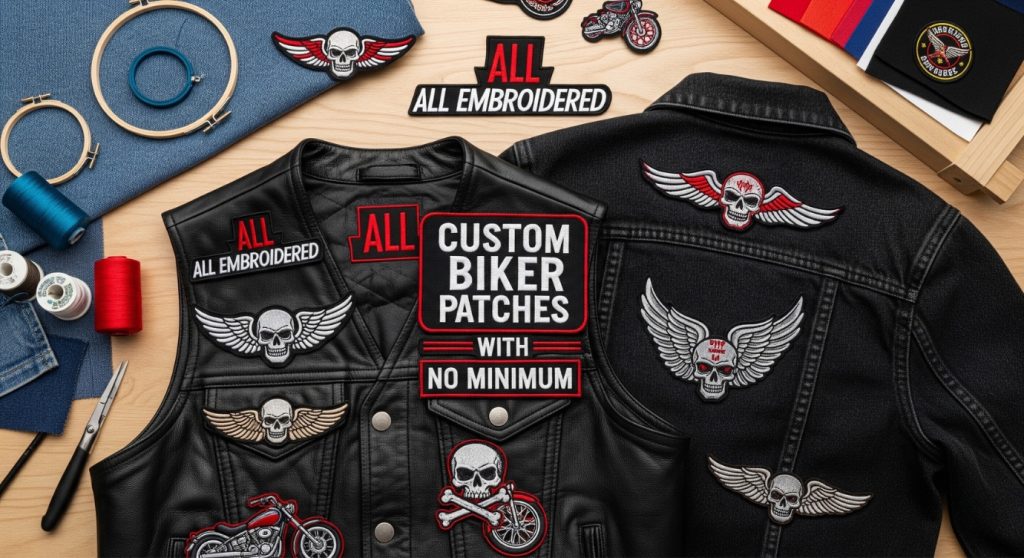
No Minimum Order — Why It Matters
Traditional minimum order quantities existed because of the setup costs involved in digitising artwork and calibrating embroidery machines. As digitising has become more efficient, many quality suppliers have eliminated minimums entirely — serving the solo rider market that represents a significant portion of the patch-buying community.
For memorial patches — a single patch made to honour a rider who has passed — no-minimum ordering is essential. For small social clubs ordering a first run of five or six patches, it removes the barrier that used to force compromising on quality to hit a quantity threshold. Custom biker club patches should be accessible at any scale.
Turnaround Times and Rush Orders
Standard production: 10–14 business days from sample approval. This is the default timeline for most quality suppliers and applies to both single-piece and bulk orders.
Rush production: 5–7 business days — typically 20–30% surcharge. Confirm rush availability before ordering; not all suppliers offer this service for custom digitised designs.
International shipping: Add 3–10 business days for delivery outside the supplier’s domestic market. Allow additional time for customs clearance on textile goods in some jurisdictions.
Frequently Asked Questions
How do I design a custom biker patch?
Start with a clear brief — patch shape, dimensions, colours, and the text or imagery you want included. If you have a graphic designer, brief them to produce a vector file (AI or EPS format). If not, most patch suppliers offer a basic design service for an additional fee. Provide colour references (Pantone numbers where possible) and specify whether the patch will go on a leather or denim vest, as this affects backing recommendations.
What file format do I need for custom patches?
Vector files — AI (Adobe Illustrator), EPS, or SVG — are the preferred format for all quality suppliers. They scale without quality loss and give the digitiser accurate colour and shape information. If you only have a raster image, provide the highest resolution PNG or TIFF available (minimum 300dpi at the intended print size). Never provide JPEG files or screenshots from social media — the compression artefacts create errors during digitising.
How much does a custom biker patch cost?
Pricing varies by patch type, size, complexity, and quantity. A single embroidered patch from a no-minimum supplier typically ranges from $8–$25 USD for a standard chest patch size, with back patch sizes higher. Digitising fees ($15–$40 one-time) apply to the first order for a new design and are waived on repeat orders. PVC patches run slightly lower per unit. The cost per patch drops significantly with quantity — ordering 10 versus 1 can halve the unit price.
Can I order just one patch?
Yes — that is exactly what no-minimum ordering means. Any supplier advertising custom biker patches with no minimum will produce a single patch to the same quality standard as a bulk order. The per-unit cost will be higher than a quantity order, and a digitising setup fee typically applies to the first design, but there is no requirement to order multiples. Single-piece orders are particularly common for memorial patches and personal vest patches.
How long does custom patch production take?
Standard production is 10–14 business days from sample approval — not from the date you place the order. Factor in 2–4 days for the digitising and sample proof stage before the production clock starts. Rush production options compress this to 5–7 days with a surcharge. Add shipping time on top: domestic 2–5 days, international 5–14 days depending on destination. For time-sensitive orders — club events, memorial rides — place your order 4–5 weeks in advance to build in buffer.
Ready to Order Your Custom Patches?
No minimum order. Embroidered, woven, and PVC options. Vector artwork to finished patch in 2–3 weeks. Browse our standard patch range or start your custom order today.
Also read: Biker Patches Style Guide | Complete Biker Patches Guide